

Fall crafting gets a grown-up refresh with fabric pumpkins, leaf jar lanterns, dried orange garlands, painted pots, and clay ornaments made for shelves, tables, doors, and seasonal gatherings. Ghost art, coasters, doormats, pine cone creatures, and small garlands add playful Halloween details, while simple supplies, leftover fabric, paper, clay, and natural materials keep the projects approachable.
Stamped Clay Magnets

Leftover clay scraps from another project can be used to make magnets.
Cut air-dry clay into flowers and leaves, then stamp or paint the shapes and let them dry. Glue small magnets to their backs.
Using one color family helps the piece look intentional, whether it is displayed on a fridge or a magnetic board.
Fall Gnome

Layered leaves and a raffia beard give the gnome its main texture.
The gnome combines a burlap hat with a raffia beard, yarn beard, faux leaves, a small pumpkin, and a wooden bead.
Hang the fall gnome in a covered location. Burlap and raffia can both be affected by wet conditions.
Halloween Rope Ghost
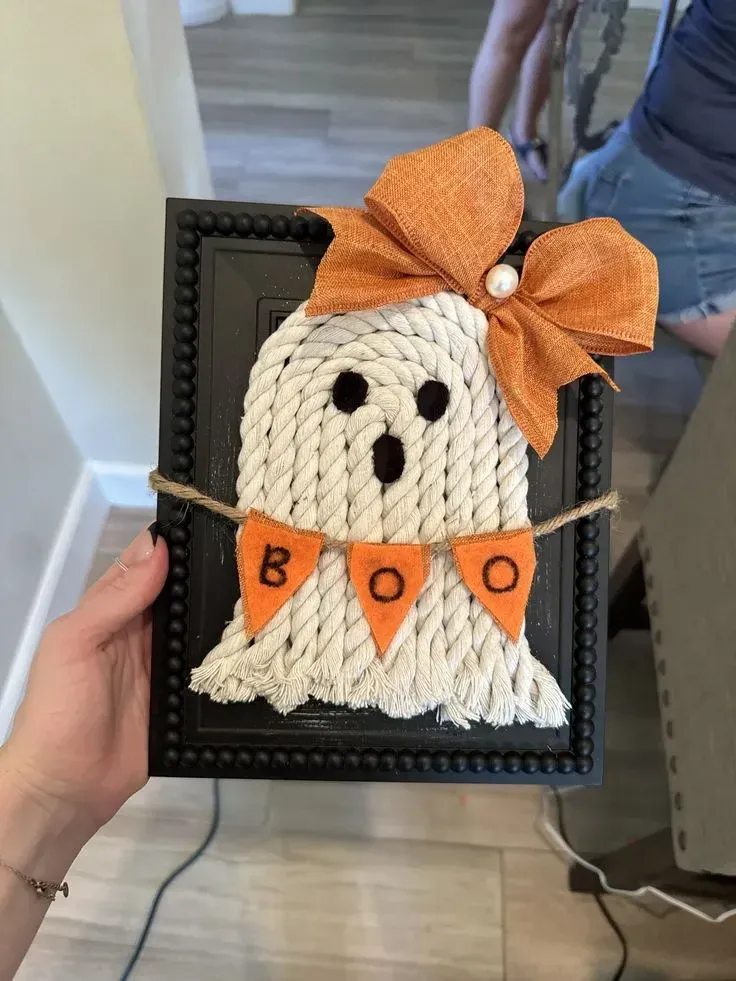
The rope ghost has a neutral look that fits neutral Halloween decor.
Macrame cord and thick rope form the ghost shape, while black felt makes the eyes. An orange bow is used on the ghost, and an optional tiny banner can add the text “boo.”
Glue the rope ghost to a small frame or a backing board, then prop the finished ghost on a shelf.
Painted Fall Doormat
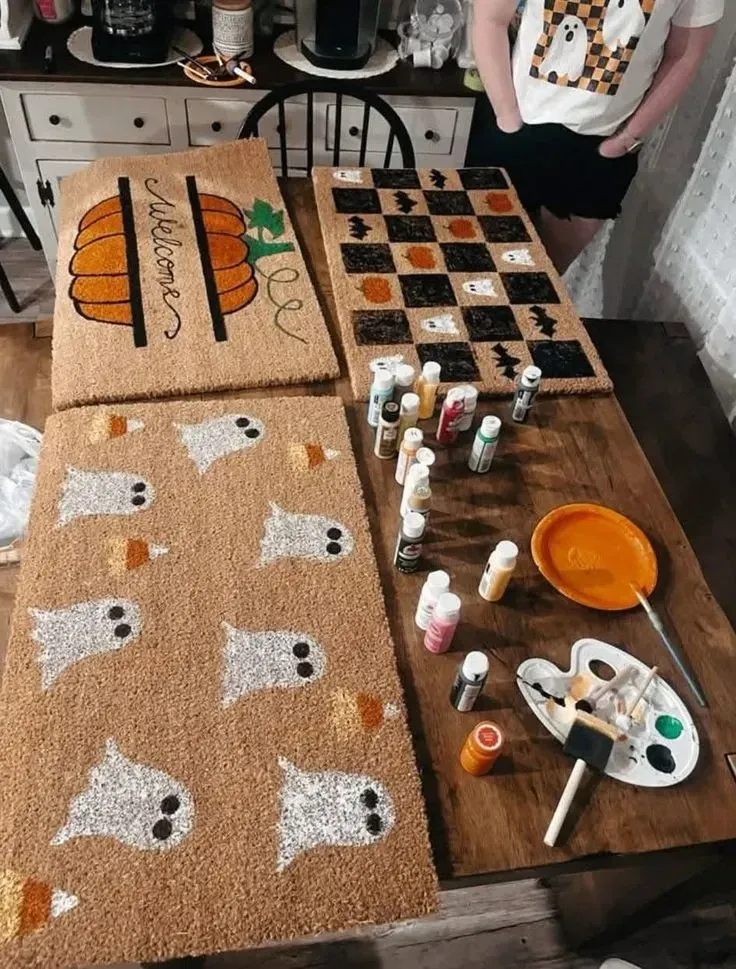
The finished doormat can still be used after it is crafted.
Start with a plain coir mat, then use acrylic or outdoor paint with painter’s tape and stencils. The motifs can be ghosts, pumpkins, checks, or fall words, applied with stencils or drawn by hand.
Use chalk to sketch the layout on the mat first, which lets you check the spacing. Paint once the layout is sketched.
Soft Fabric Ghost Garland
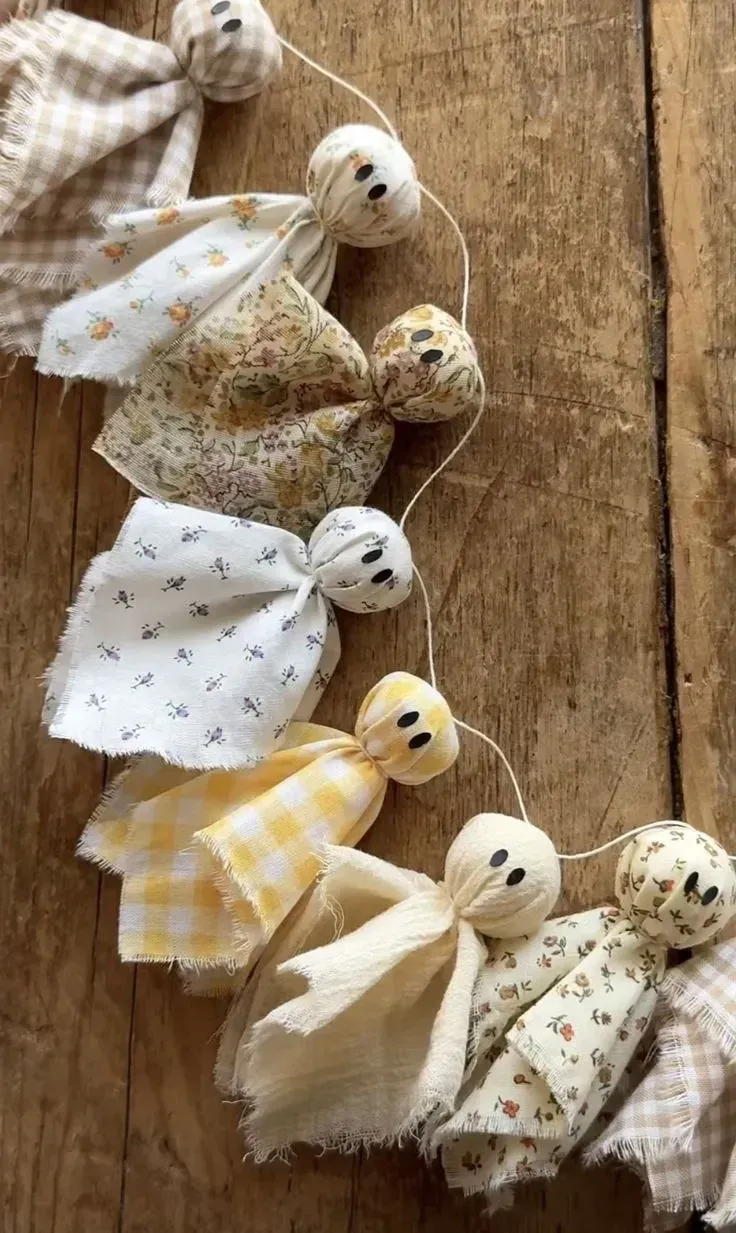
For early fall decorating, a soft fabric ghost garland is cuter than scary. It suits the season before the decorations need to look frightening.
Wrap the piece in small fabric squares, fill it with cotton balls or wooden beads, and give it tiny drawn faces. Tie twine beneath its head.
Use varied neutral fabrics for a softer look; floral, gingham, muslin, and linen fabrics can all work together.
Ghost Candles
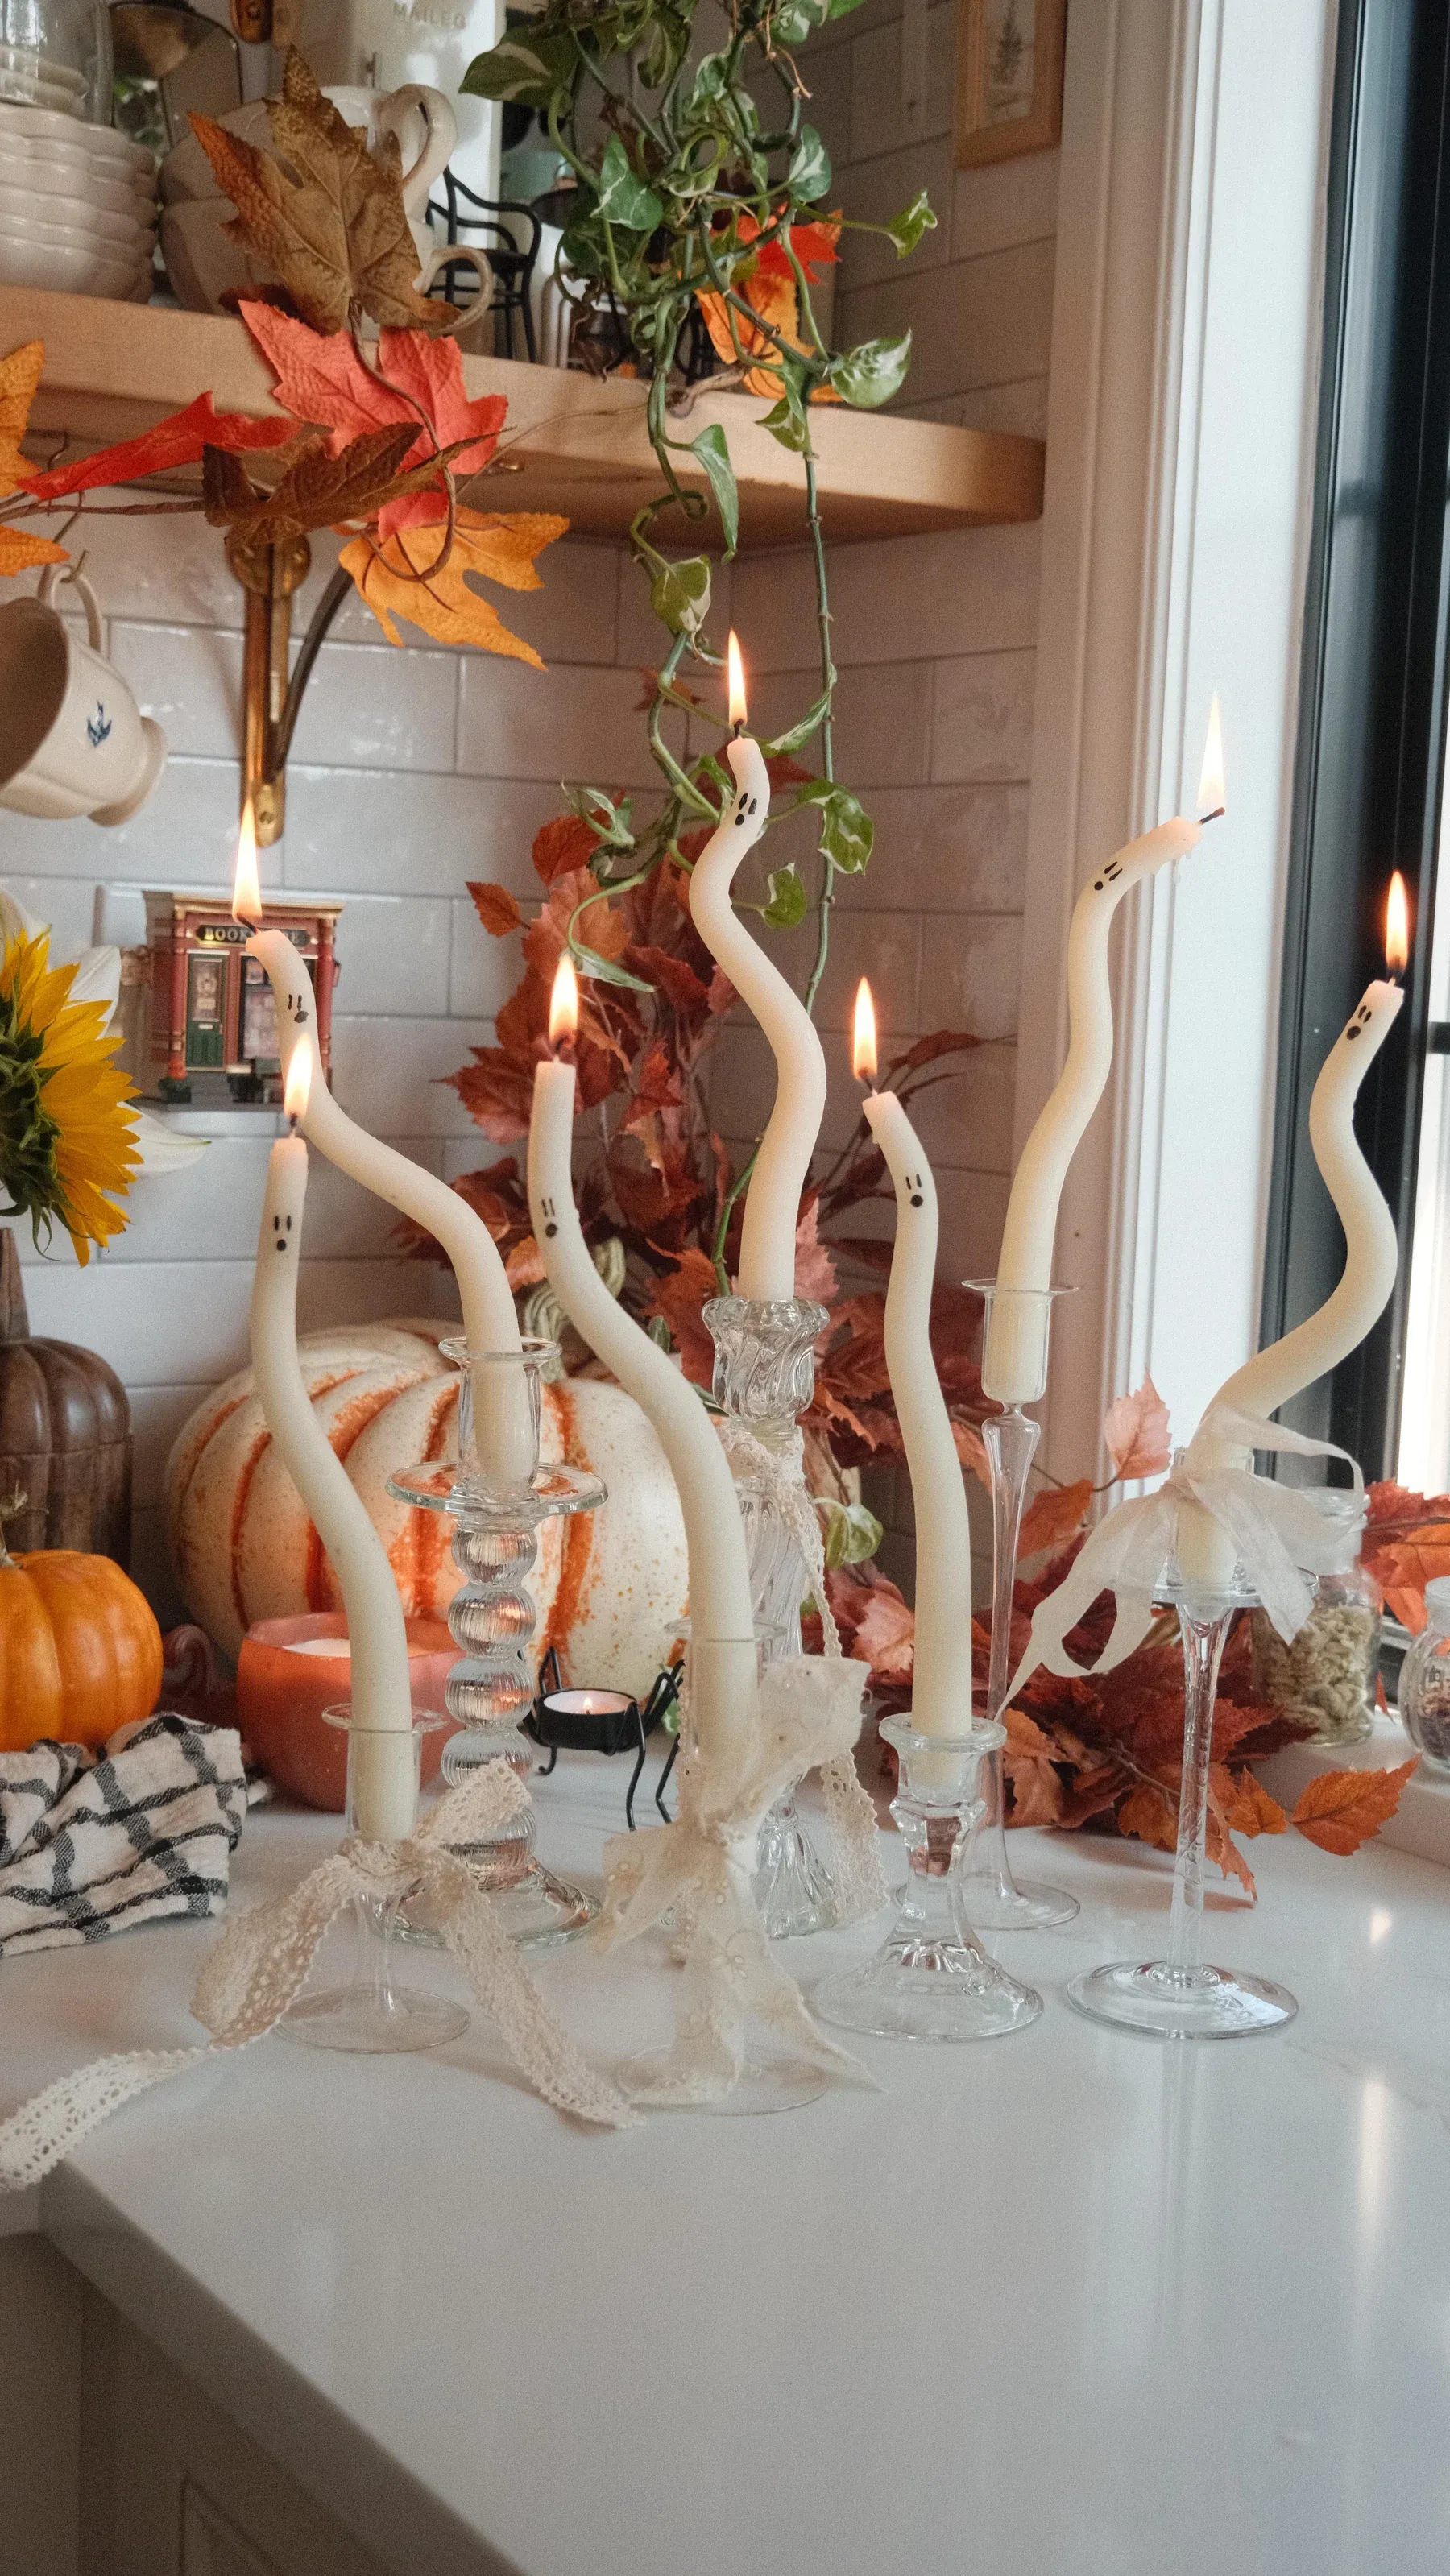
Bent candles work as fall counter decorations or on Halloween tables, where their shape adds a playful mood.
Warm white wax taper candles in water until they soften, then curve them into wavy ghost forms and let them cool. Once they are firm again, give each face using a black marker or paint pen.
Proper candle holders give these bent candles a secure place to sit, and the curve should remain gentle so each one stays securely in place. Even with their altered shape, they need to be treated as real candles.
Painting Figures as Jack-o-Lanterns

Slightly wonky jack-o-lantern faces give the figures a vintage handmade look.
Paper mache or wood pumpkin bases can take painted faces, raffia, ribbon, tiny hats, and fabric scraps.
Let the jack-o-lantern figures vary instead of making every one identical. A mismatched group works better on a shelf.
Simple Framed Ghost Art
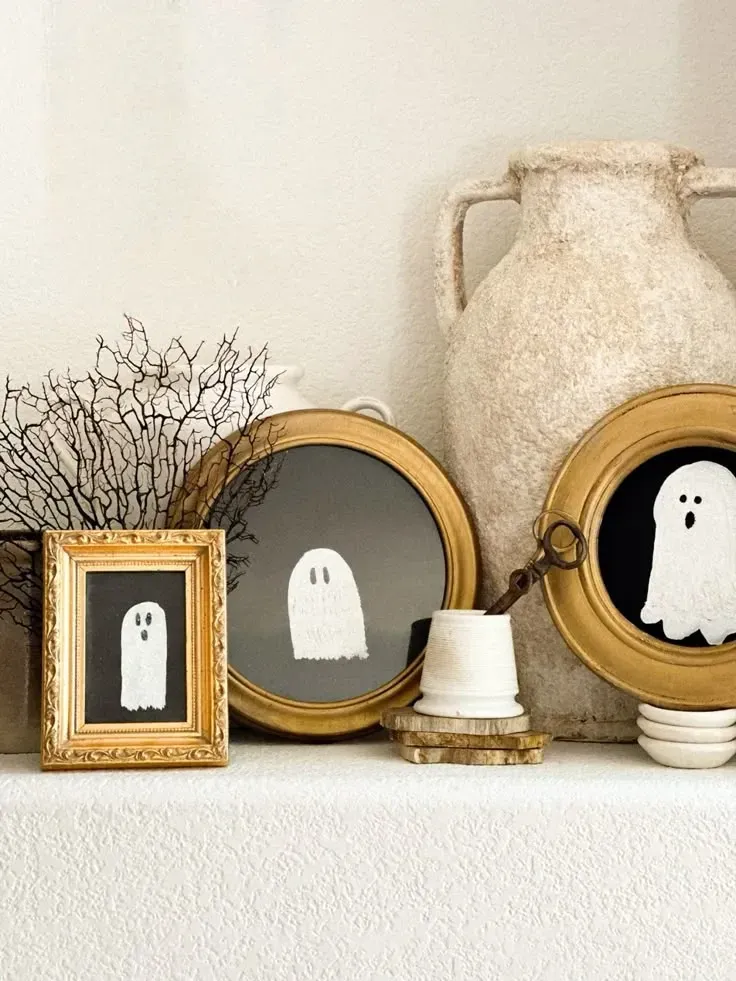
A thrifted frame gives the ghost art a finished place to sit, so it appears as decor rather than a quick craft.
Inside the frame, paint small ghosts with white paint and cut black paper to fit behind them. Once the paint dries, add tiny faces.
Gold, wood, and vintage-style frames are all good options, and most frames work for this project.
Small Halloween Cauldron
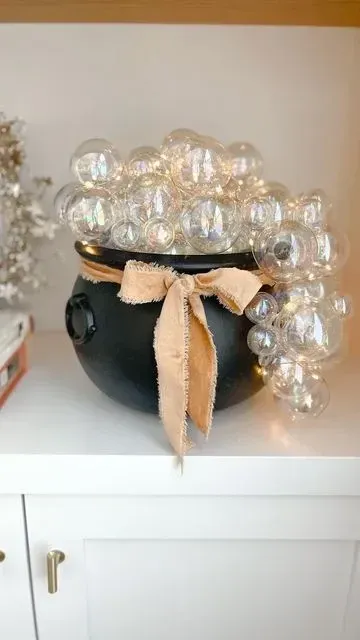
Place clear baubles inside the cauldron to create the appearance of bubbling.
Place clear plastic ornaments on the cauldron rim and secure them with glue. For the front accents, use ribbon, fairy lights, or fabric.
Let some of the bubbles rise over the edge. Placing them this way, rather than in a neat row, makes the overflow appear playful.
Embroidery Hoop with Dried Flowers

An embroidery hoop filled with dried flowers makes a softer fall sign.
Tie string across the hoop and weave the dried flowers through its center. Secure the flower stems with small knots or glue so they stay in place.
Keep the dried flowers fairly flat when the embroidery hoop sits against a wall, since bulky stems can pull it into a forward tilt.
Fall Frames from a Small Egg Carton
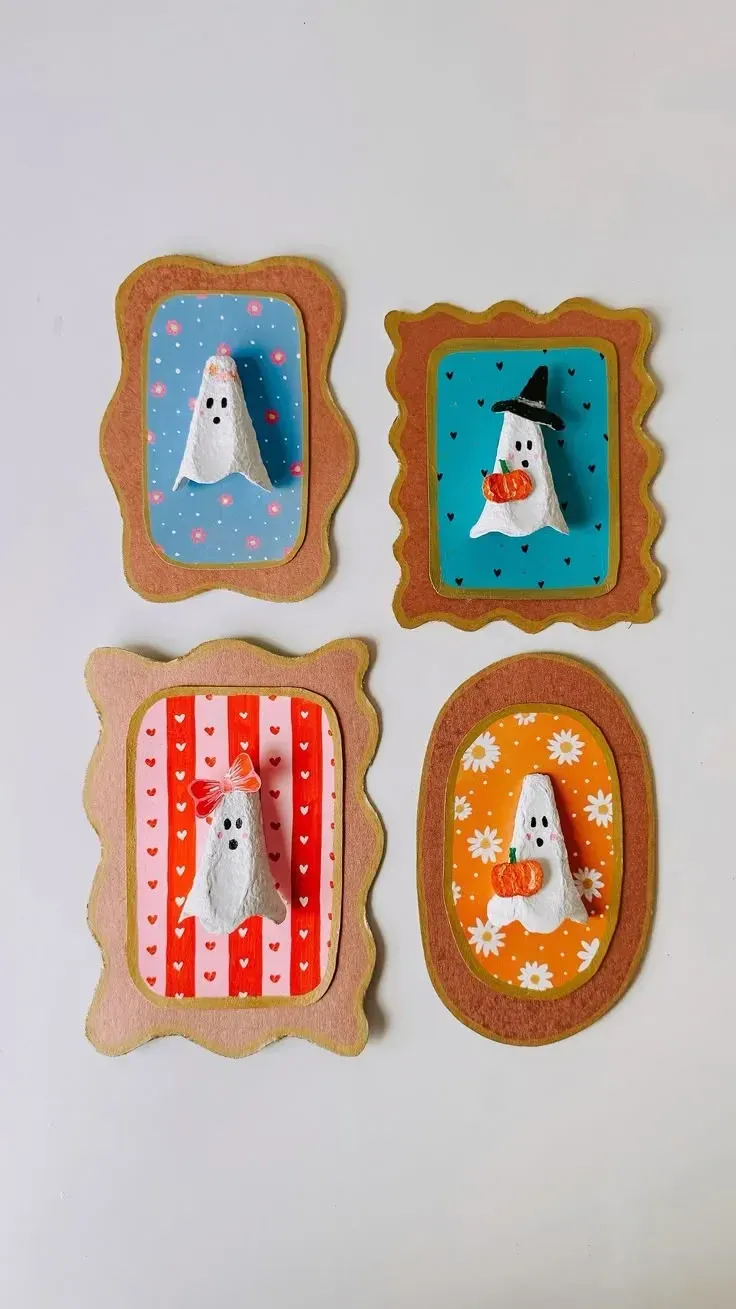
Cut discarded egg cartons into small frames for this project.
Patterned paper can fill the interiors of these little frames, along with witch, pumpkin, and ghost details. Paint the egg carton in fall colors, then shape it into small frames and add the paper and decorations inside.
The project requires no expensive supplies, which makes it suitable for craft nights. Participants can each make different mini frames.
Large Halloween Porch Ghosts
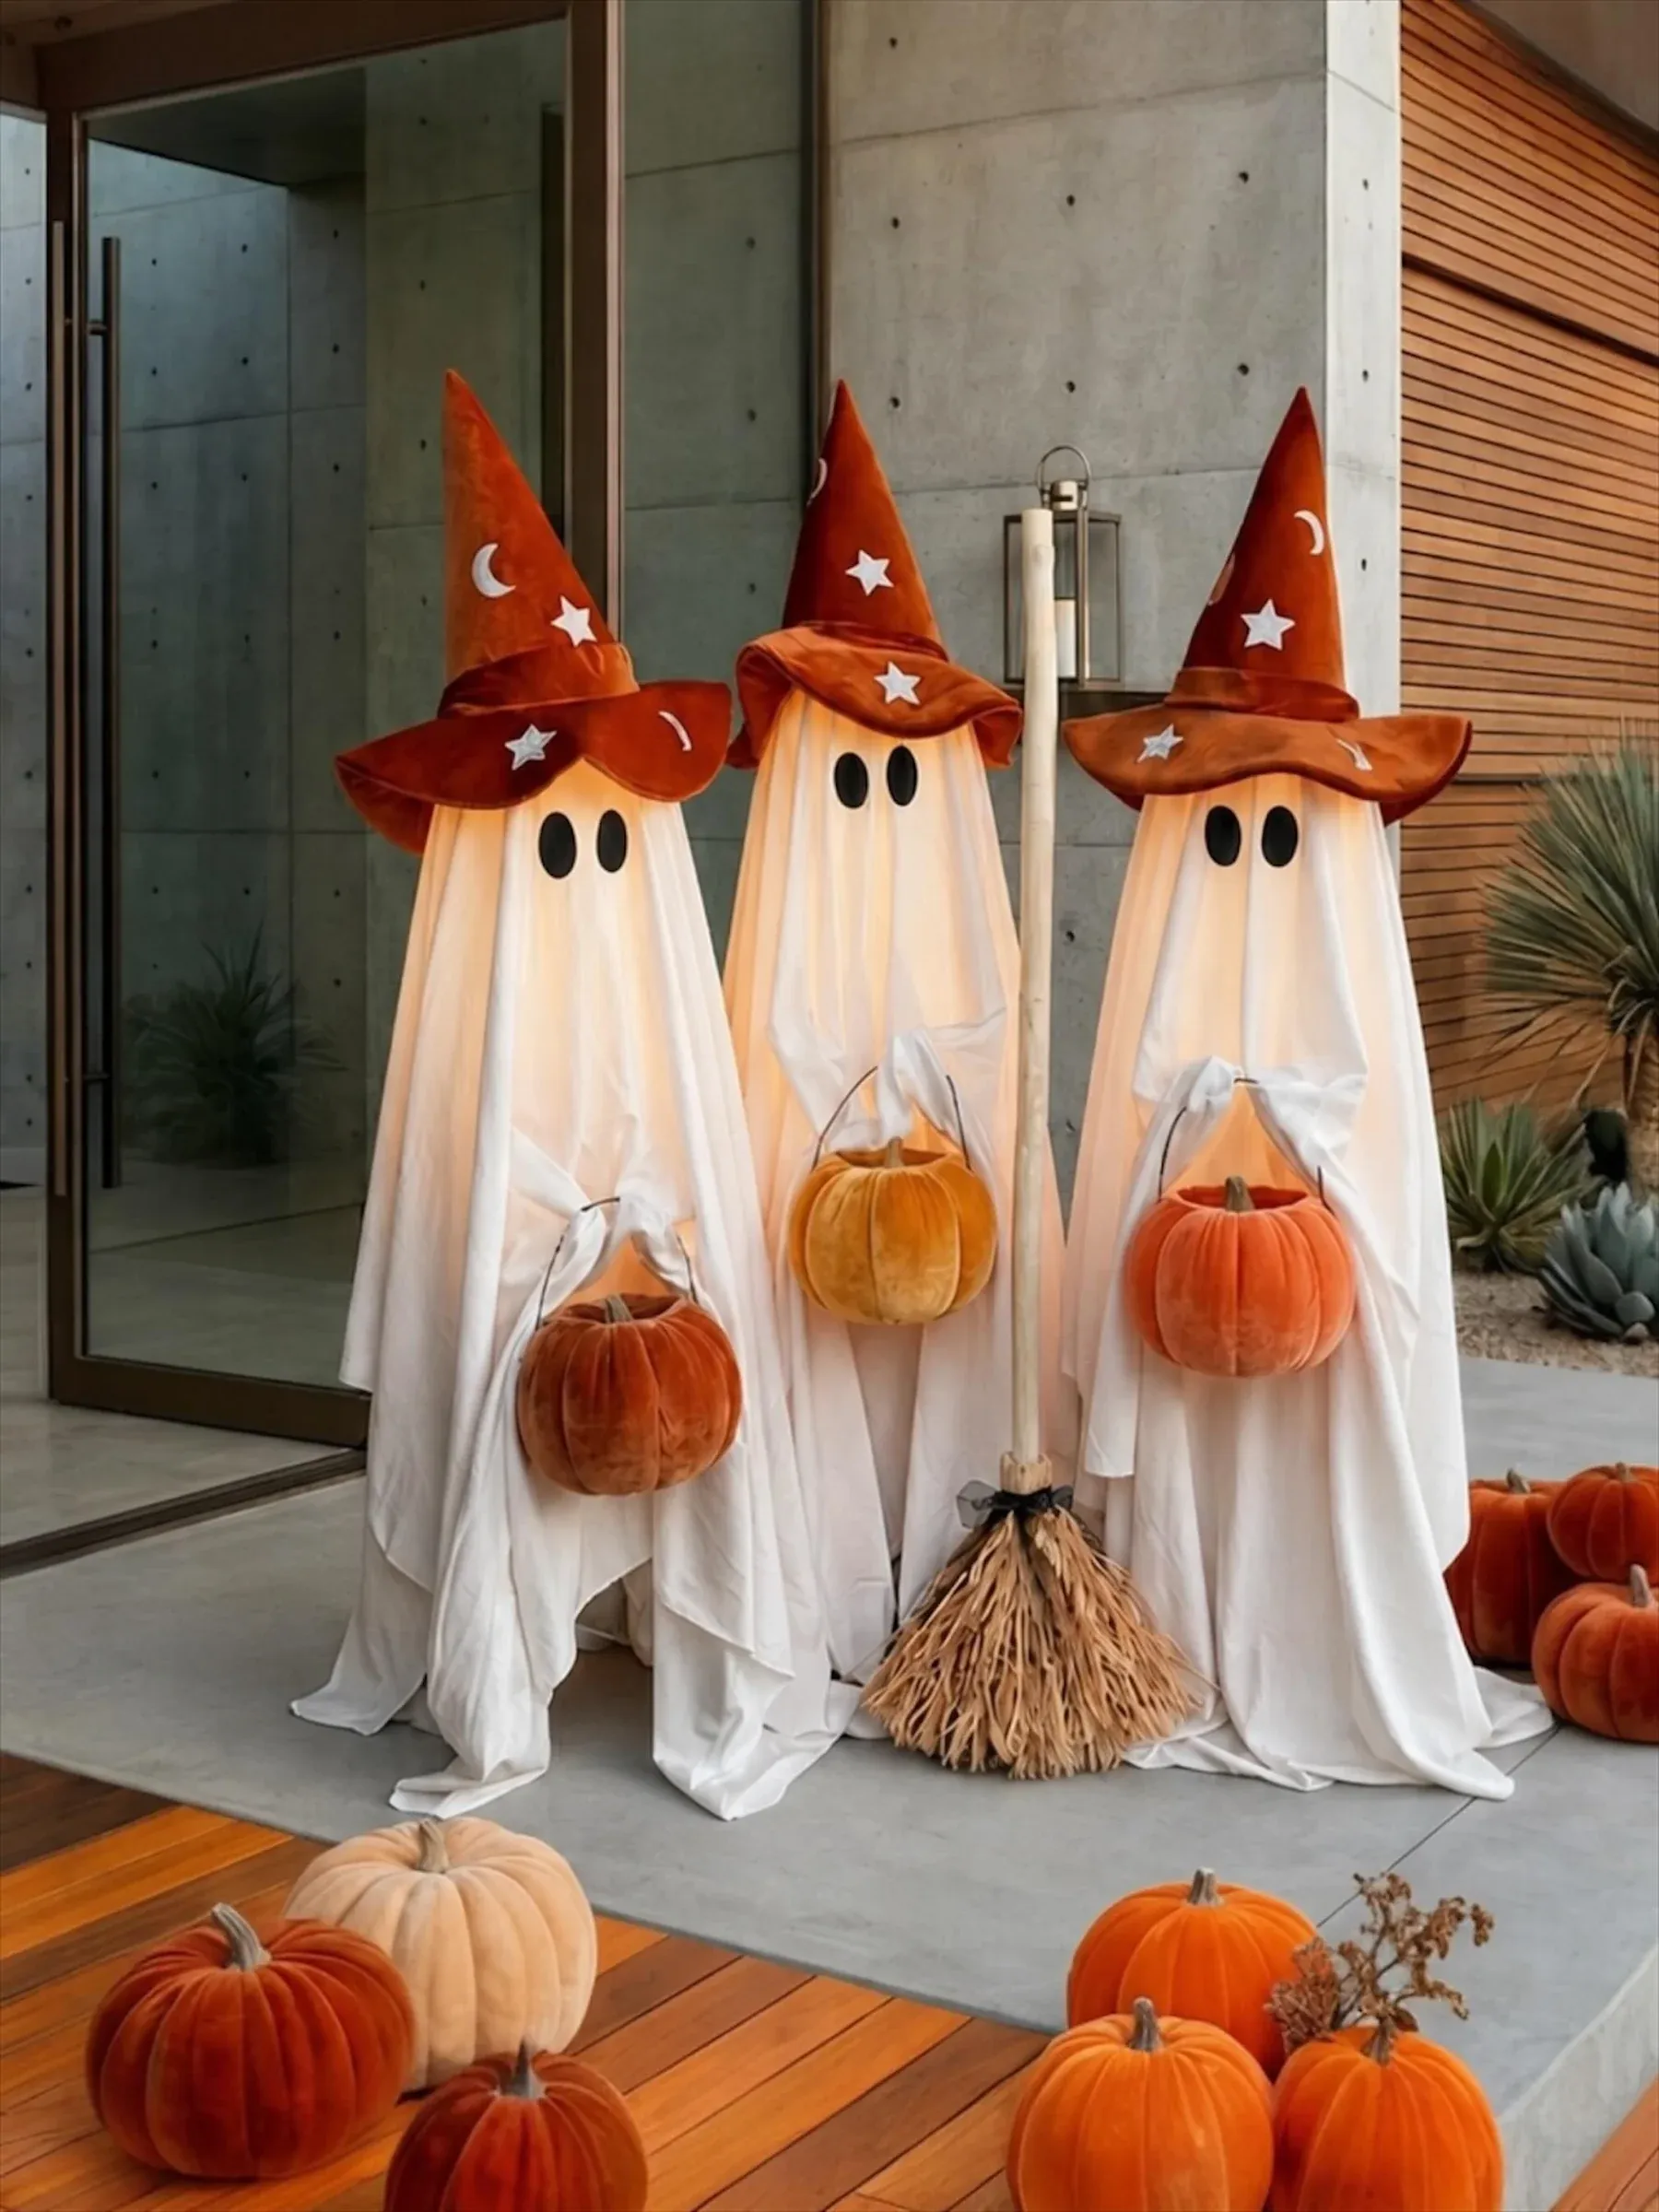
On a decorated porch, larger ghosts make the display more noticeable. The supplies for these ghosts can still be simple.
A basic ghost frame can be covered with lightweight fabric or white sheets, then finished with black eyes, witch hats, brooms, and pumpkin buckets.
For outdoor use, weigh down the ghost bases so the wind does not move the fabric ghosts around.
Fall Pumpkin Paint Event
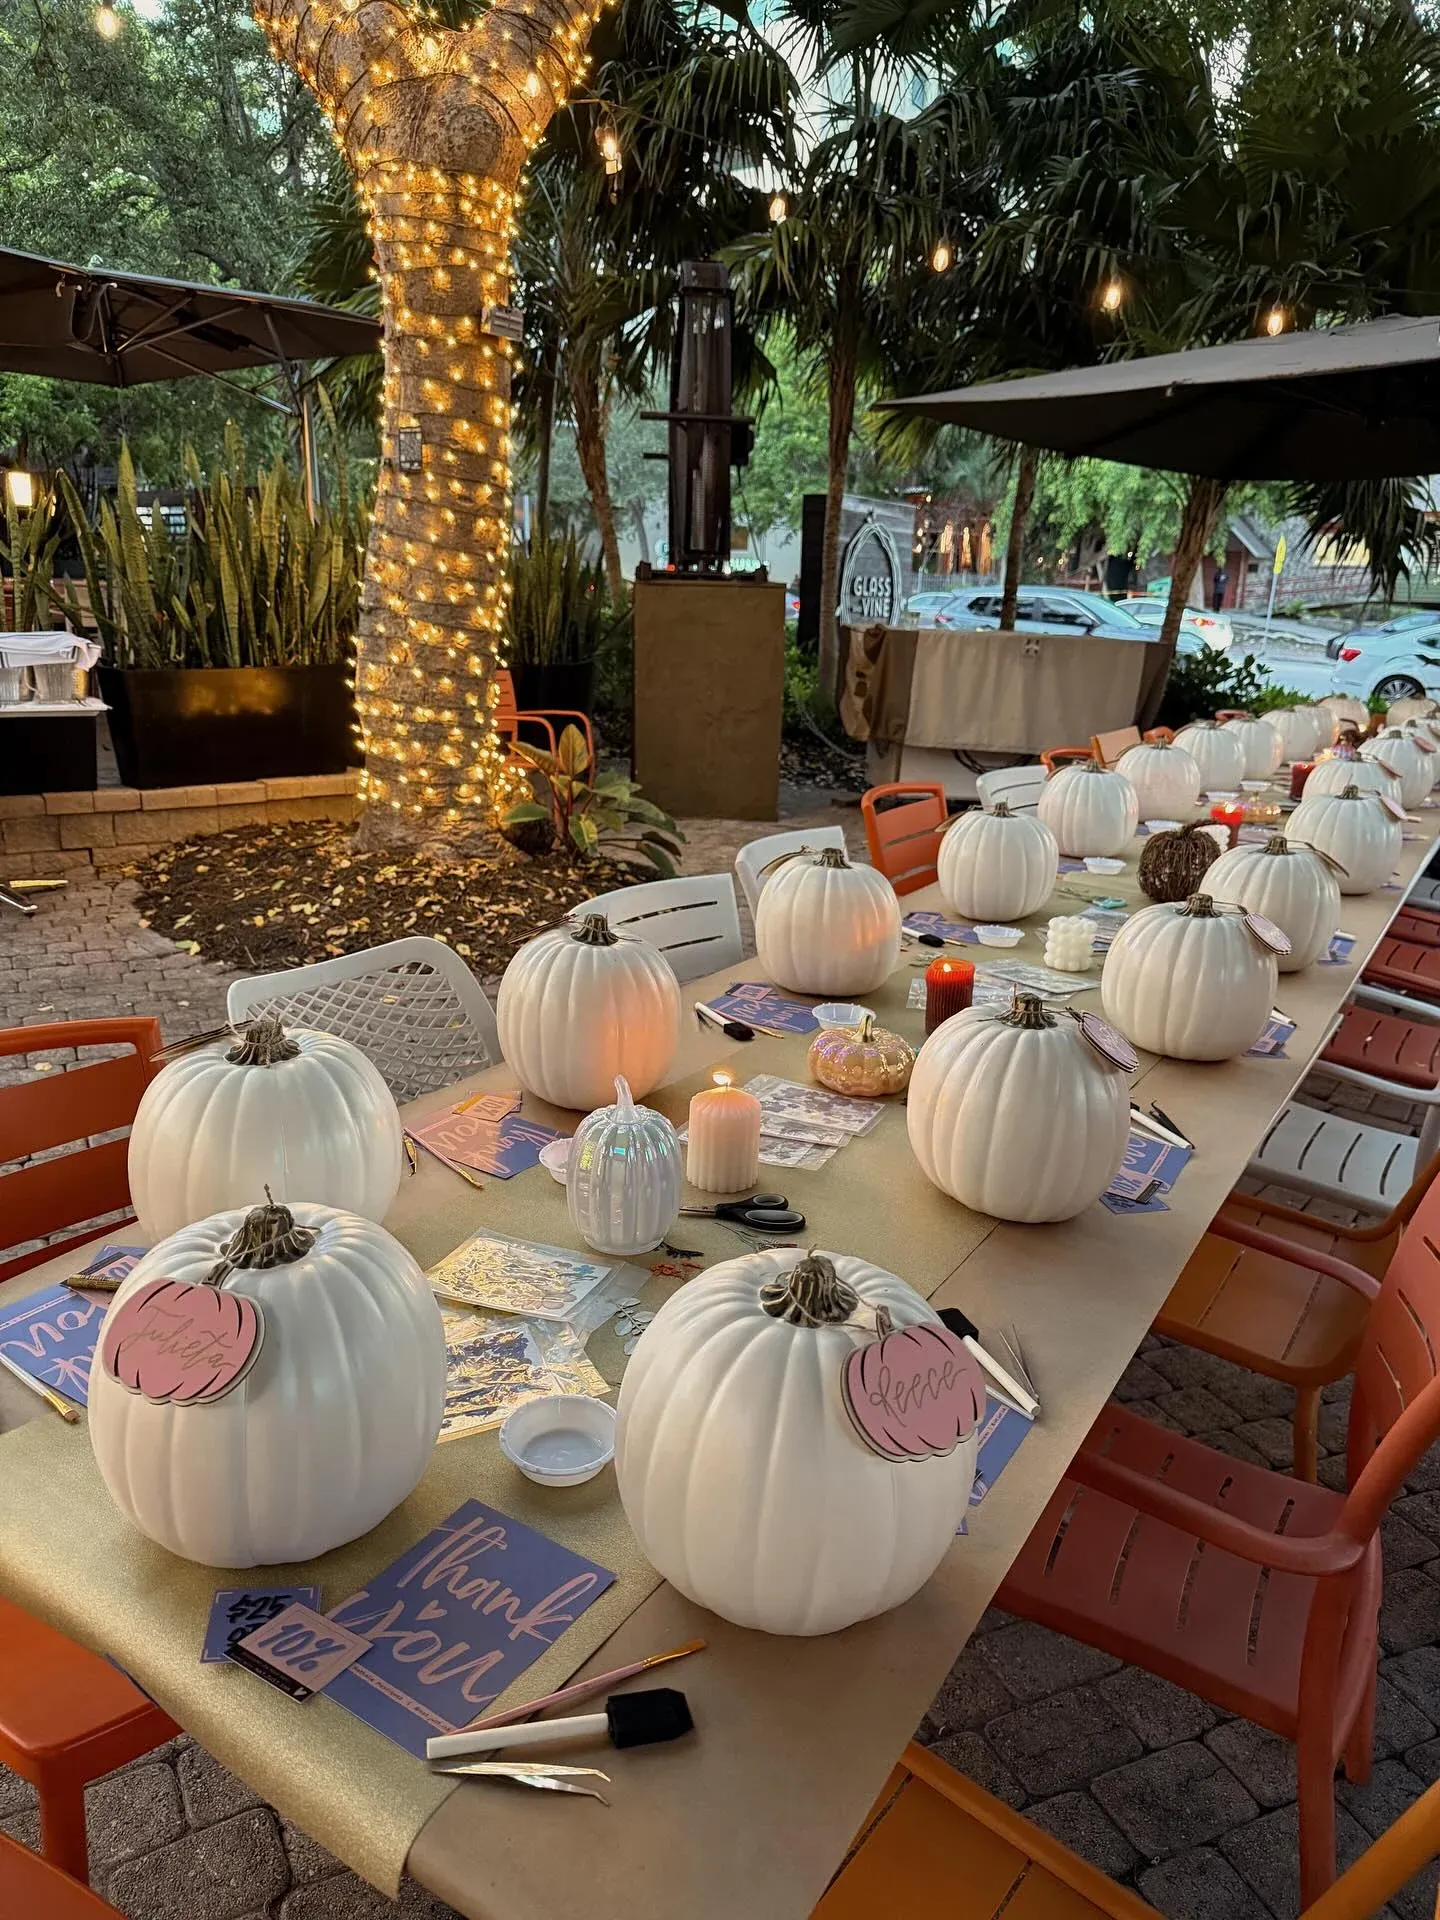
Use a long table for the event, since it supports the craft night setup and gives everyone a shared place to work.
Set white faux pumpkins, paint pots, paint brushes, and napkins on the long table. Each participant can also have a name tag and an inspiration card assigned to them.
Faux pumpkins are the better choice for long-term keeping, and a faux pumpkin craft can last until next year. Real pumpkins can also be used for crafting, but real pumpkin crafts have a shorter lifespan.
Leaf Jar Lanterns

A leaf lantern works on shelves, entry tables, or at fall dinners. The mason jar gives off a glow that supports a cozy atmosphere.
Start with a clean mason jar and faux or pressed leaves. Press the leaves onto the jar’s exterior, then brush Mod Podge over the jar to seal them. Let the sealed jar dry fully.
The battery tea light is easier to leave out than a real candle, and it still produces a warm look. Place the battery tea light inside the jar, with the battery option preferred over a real candle.
Fabric Pumpkins
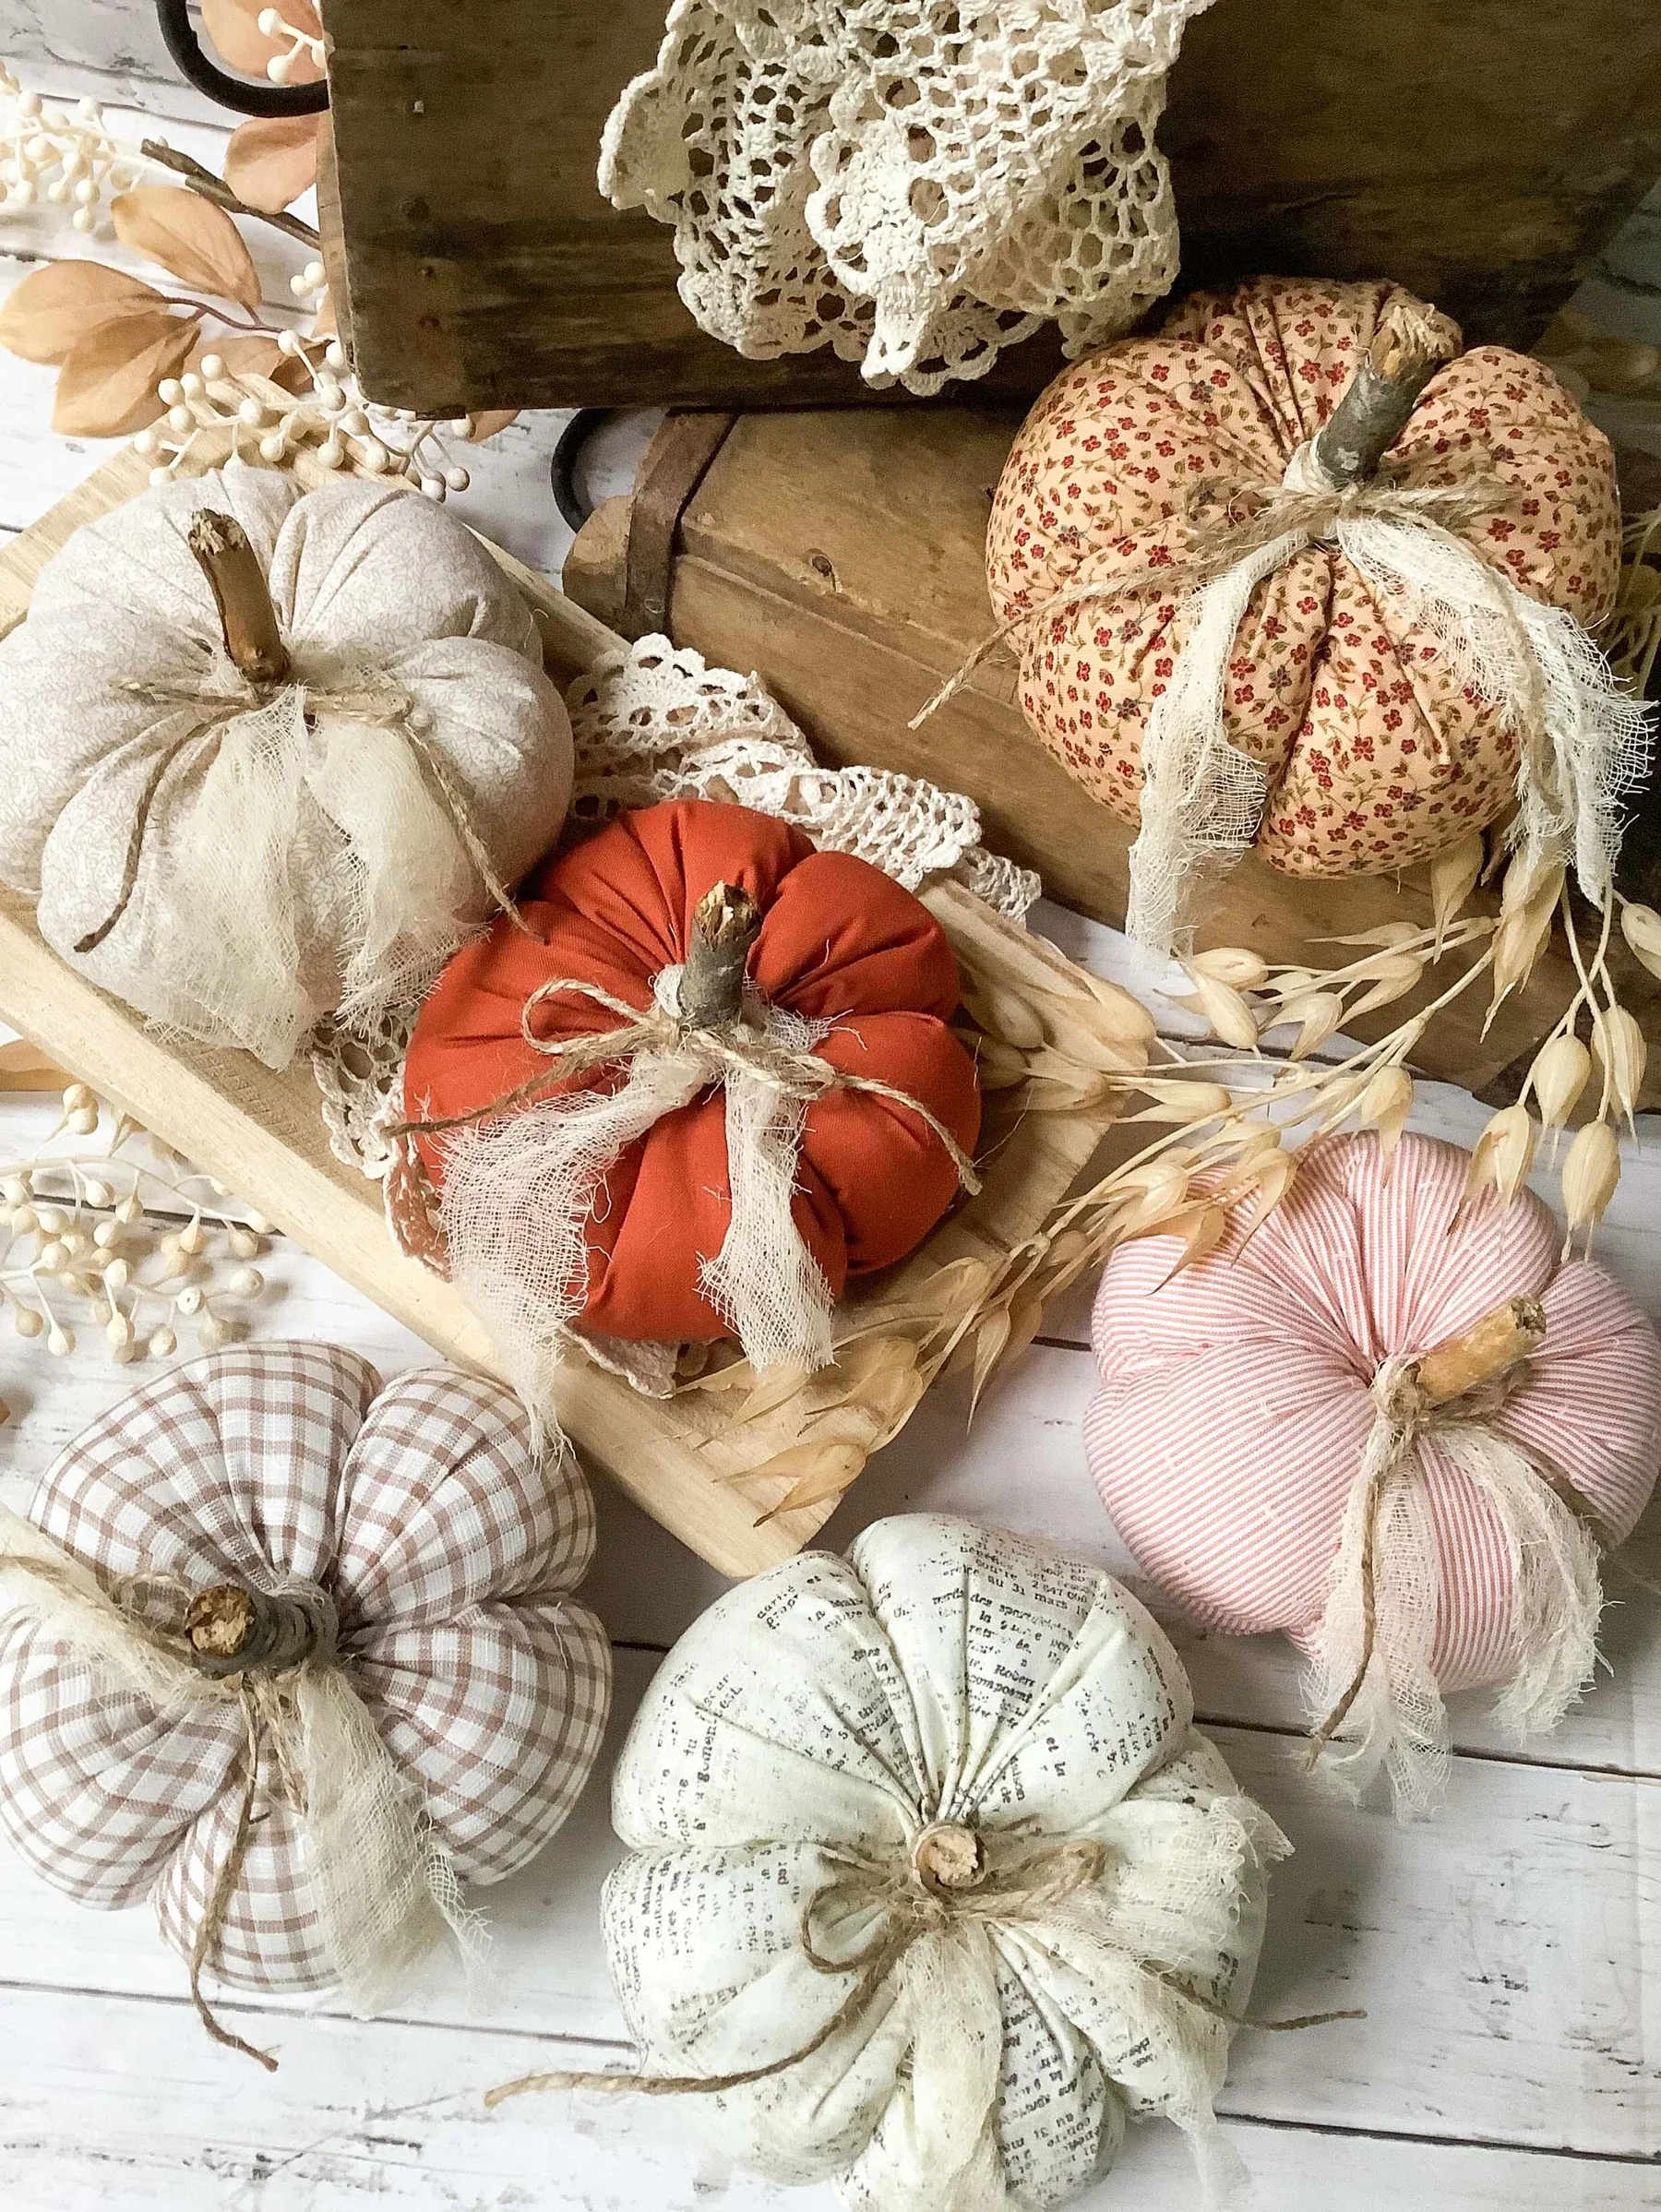
Leftover fabric scraps can be reused for fabric pumpkins every fall. Use the scraps to make the fabric pumpkins.
Fill the fabric circles with stuffing, then pull the loose thread around the edge tight. Wrap twine around the pumpkin to create its ridges, after cutting the fabric into circles and sewing around each circle edge with a loose stitch.
Mix gingham fabric, floral fabric, linen, and burlap for the pumpkins, then use a stick or cinnamon stick for the stem.
Garland of Paper Acorns
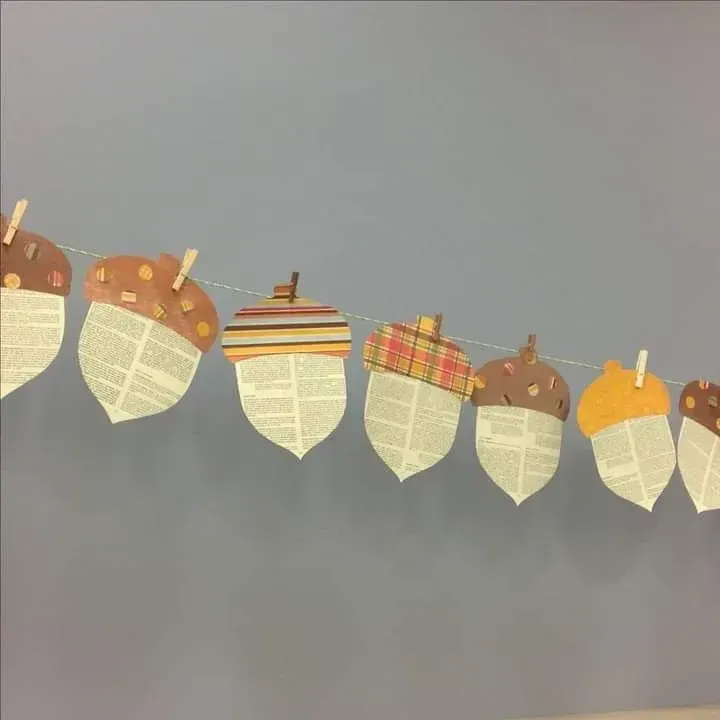
Paper acorns are easy to make, and the finished garland weighs almost nothing.
Cut acorn shapes from brown paper or patterned paper and string them onto twine to form the garland. Glue paper acorn tops onto the shapes.
In a rental, a paper acorn garland is easy to use because it weighs almost nothing and needs no nails for installation.
Small Halloween Stands Made from Popsicle Sticks

The stands appear detailed even though each base consists of popsicle sticks. The small construction keeps the focus on the stand details.
Glue popsicle sticks into booth shapes and paint them orange, white, black, or pink. Add paper stand details such as ghosts, signs, bows, banners, or other Halloween details.
Signs help differentiate the stands, whether they are a candy stand, potion stand, or ghostly goodies stand. Group the stands on a shelf.
Bats with Pine Cone Bodies

A few pine cones are enough to support this low-cost craft.
Brown wings cut from felt or cardstock form the bats’ wings, while the pine cones become their bodies. Add small ears and tiny eyes, using glue for assembly.
Brown wings give the bats a more natural appearance, while black wings add a Halloween feel.
Mini Pumpkin Vase Arrangement
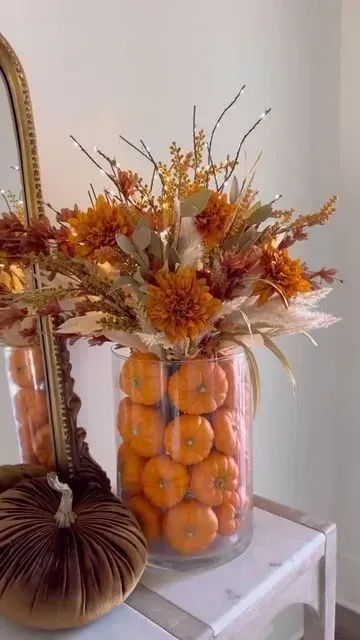
A pumpkin vase is easy to put together for a fuller arrangement.
Dried stems, faux leaves, and fall flowers are tucked into a tall clear vase. Faux mini pumpkins fill the vase along with the arrangement fillers.
The mini pumpkins work as vase filler and help position the stems higher. With a large bouquet, less pumpkin filler is needed.
Pie Slice Garland with Twine

A twine pie slice garland suits a kitchen, a Thanksgiving area, or a dessert station. The food-related setting fits the pie shape.
The pie slices can be made from felt or cardstock and cut into pie shapes. Add felt or cardstock crust and whipped cream details, then glue the pieces onto the twine.
Place the pie slice garland near the kitchen, Thanksgiving area, or dessert station as an alternative to pumpkin- or leaf-themed decor.
Fall Ornaments Sewn from Felt

These felt ornaments are small and require only a short sewing project.
Cut two circles from felt and add a fall shape to the front circle, such as a pumpkin, ghost, candy corn, or leaf. Stitch around the edge of the circles, leaving room to fill them with stuffing.
Glue works for the tiny felt details, while stitching the ornament around its outside edge offers an alternative to glued details.
Collected Vintage Leaf Hanging

A layer made from book pages contributes to the hanging’s vintage, collected style.
Pieces from a torn book or newspaper can be glued to faux leaves or leaf cutouts, which form the main piece. Tie the leaf bases together with twine.
Choose a damaged older book or use printed pages for the material. The visible text adds more texture than plain paper.
Dried Orange Slice Garland

On their own, dried oranges can create warmth without making the styling look bright or overly themed. They bring a warmer feel to the arrangement while keeping it from becoming too specific.
Slice the oranges thinly and blot away the extra juice before drying the slices slowly in the oven. String the dried orange slices with twine, star anise, cinnamon sticks, and wooden beads.
Let the orange slices dry fully before storing them, since damp slices do not keep well.
Fall Pots with Painted Designs
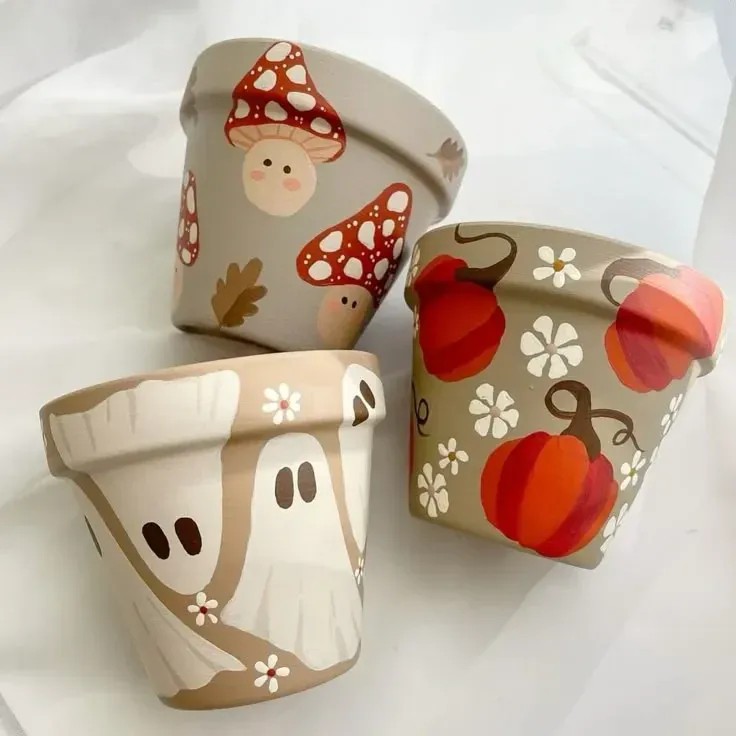
Herbs, succulents, and seasonal flowers can grow in the pots, while painted pots help the plants fit into the surrounding decor.
Terracotta and ceramic plant pots can be painted with acrylic paint using small brushes. Designs around the pots may show ghosts, mushrooms, pumpkins, flowers, or other fall patterns.
Painted pots need a seal before they are used for real plants or placed outdoors. Without sealing, use them for faux stems, pens, or shelf decor instead.
Ghost Coasters

These coasters are a manageable size, so you can paint a different fall scene on one for each person.
For a fall table, start with round or blank coaster blanks made from wood, cork, or ceramic. Add painted ghosts, mushrooms, moons, pumpkins, or fall flowers to the blanks.
On the coffee table, the coasters can be used with drinks. Seal them if they will be used for drinks, since sealing is important for coffee-table use.
Button Pumpkins
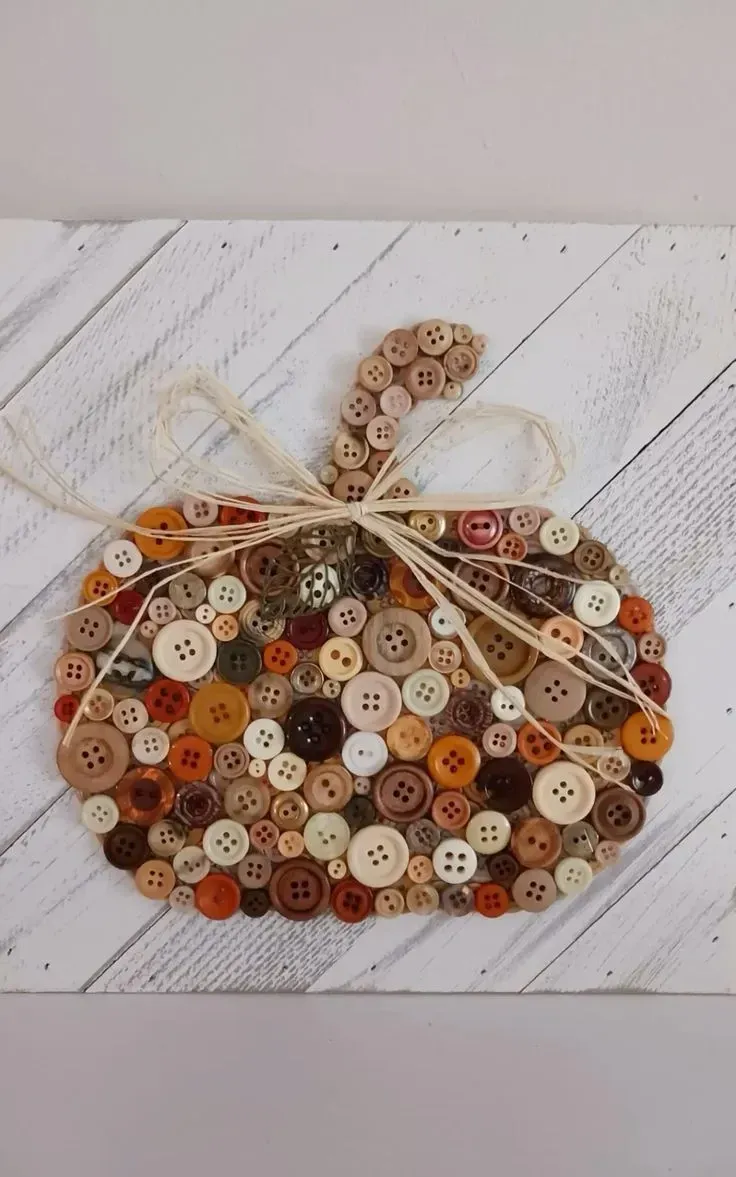
Buttons in brown, cream, orange, and copper can be used for a fall project. These colors work together on the button pumpkin.
On the front of the pumpkin, glue the buttons over a pumpkin shape that you draw or cut. Layer smaller buttons into the gaps so the button layering makes the shape look full.
Mixed button sizes create texture instead of a flat surface. Finish the top of the button pumpkin with twine, ribbon, or a stem.
Fall Ornament from Air Dry Clay

These air-dry clay ornaments work for gifts, napkins, baskets, or place settings. Their use can change depending on where they are placed.
Roll the fall ornament flat, cut it into circles, and press leaves or flowers into the clay. Make a small hole before it dries so a twine hanger can be added later.
The leaf print should remain the main detail. You can finish the ornament with paint if you want, or leave the air-dry clay plain.
Pine Cone Owl
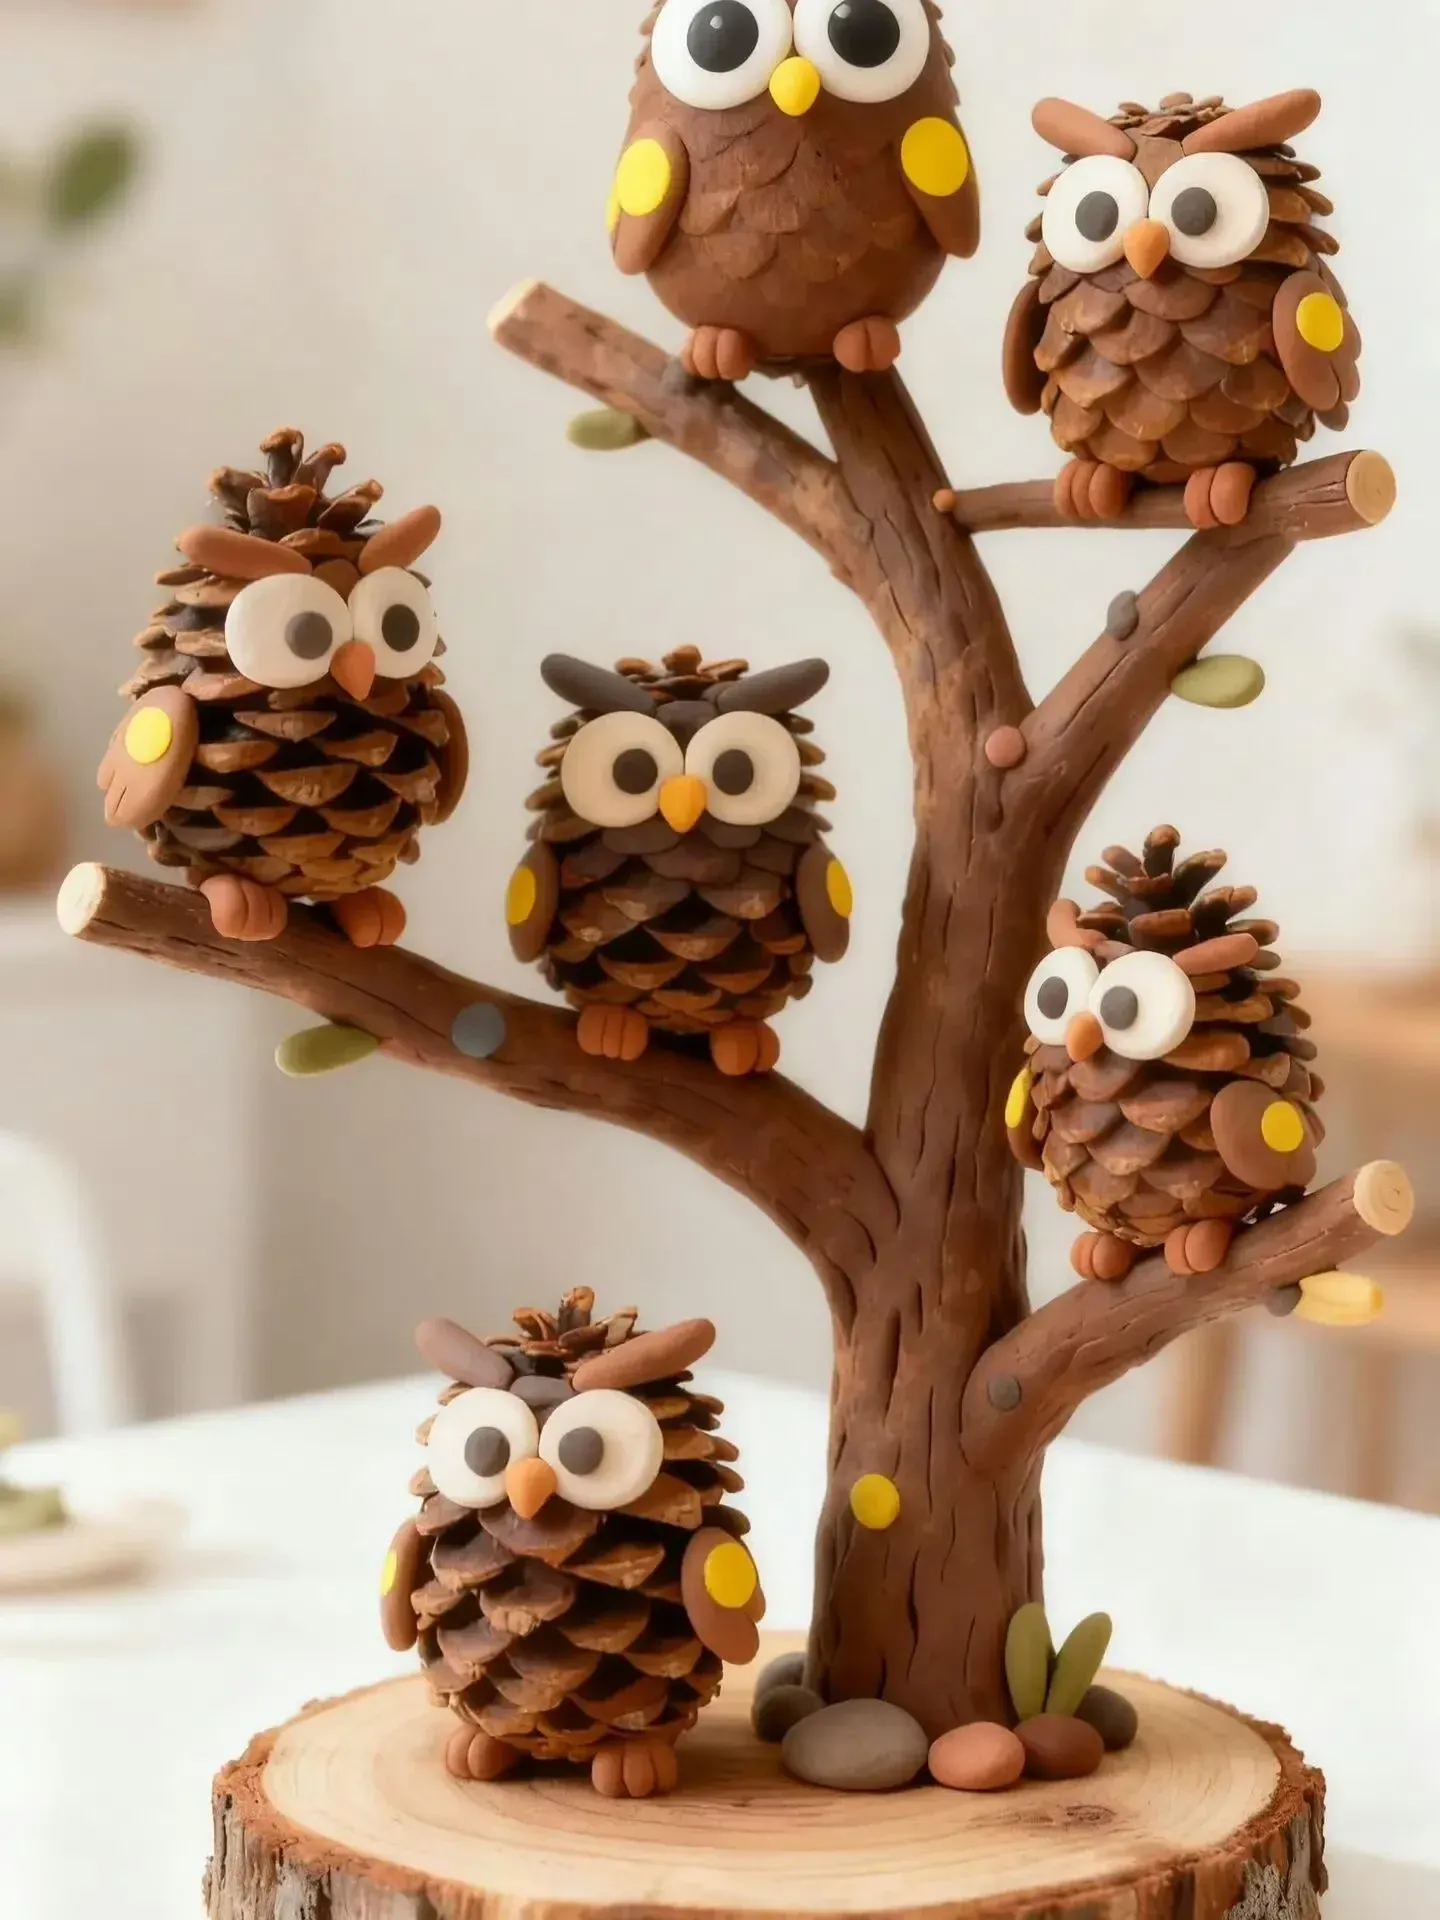
A wonky pine cone owl is perfectly acceptable here, so there is no need to aim for perfection.
The pine cone forms the owl’s body, with felt or paper wings and eyes, plus a tiny beak. Attach the pieces with glue, and place the finished owl on a branch or wood slice display base if you like.
A family of owls can include different sizes instead of just one owl. Varying the sizes gives the group a varied look.